If you are one of those people who enjoys a periodic kombucha from your favorite health-oriented grocer, but don’t love the $5 per 16 oz bottle price tag, we’ve got good news for you: Brewing kombucha at home is much easier than many people might think.
For those unfamiliar, kombucha is a delightful, mildly fizzy sweet and sour beverage made from black, green or white tea, or any combination of the three, depending on your flavor preference. The darker the tea used, the more full the flavor of the final product will be. It is a fermented beverage, which is what gives it its unique fizz. The fermentation is the result of a symbiotic culture of bacteria and yeast (or SCOBY) consuming sugar and converting it into carbon-dioxide (hence the fizz) and a host of other things.
Kombucha is loaded with probiotics, prebiotics, minerals, antioxidants and other things that aid in digestion and other body functions, which is why it is associated with a variety of health benefits, like helping to lower blood sugar. There are, therefore, all kinds of reasons to drink kombucha in addition to its delightful flavor.
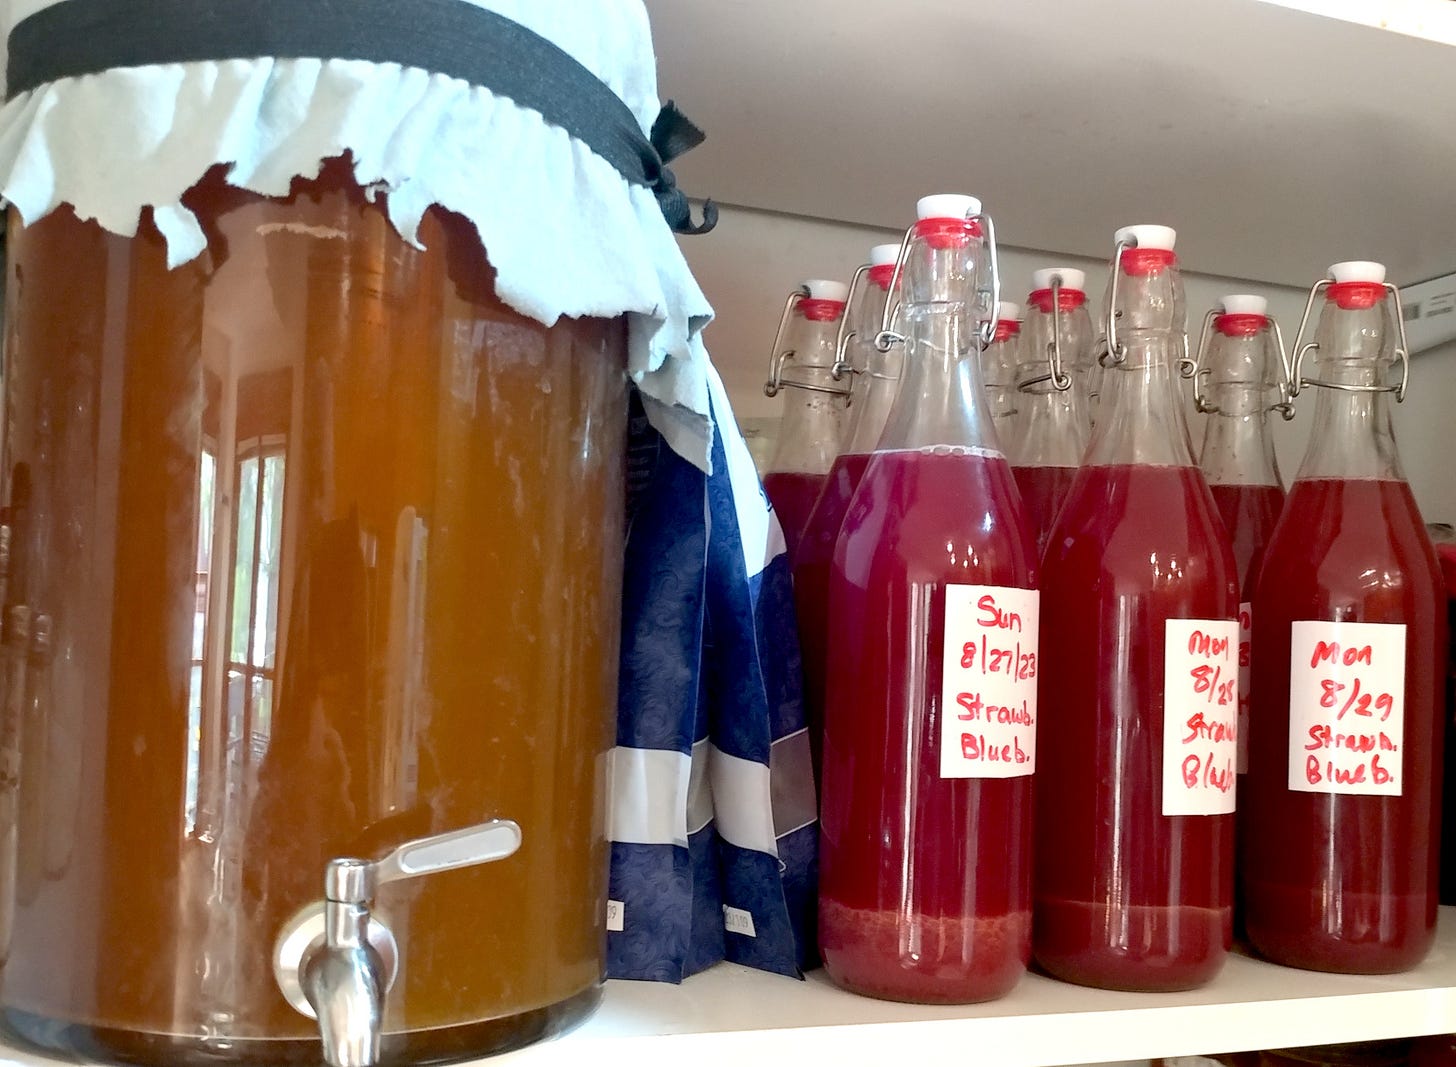
There are two general approaches to brewing kombucha: Batch and continuous brewing. At Our Urban Farms, we use a continuous brewing approach that is not at all time consuming and that keeps us with a steady supply of kombucha for daily consumption.

Fermentation Overview
Making flavored and fizzy kombucha requires two periods of fermentation. The first is the main fermentation, when the bulk of the sugar added to the tea is digested by the bacteria and yeast. The amount of time needed in this stage of fermentation depends on the amount of bacteria and yeast in your SCOBY, the temperature at which it is kept and the amount of sugar added to the tea when it is first brewed. As the tea ferments, the super-sweet flavor in the fresh brewed tea will slowly begin to develop a slightly vinegar taste. As that happens, the brew will become more acidic, which is important because the acidity in the brew is what keeps mold and other things from growing in your brew.
Some brewers like to get very scientific about their brewing and carefully measure the ph of their SCOBY. We simply taste it and know when it is ready when it has the perfect balance of sweet and sour.
When the SCOBY is fermenting in this first fermentation step it is releasing a fair amount of gas. It, therefore, needs to be kept in a container that can breathe well, but that is protected from being contaminated with dust or insects. A thin cotton cloth over the top and held in place with an elastic band will let your first fermentation (F1) container breathe while keeping it clean.
In the second fermentation, the liquid from the F1 container is put into air-tight bottles, often with a bit of fruit for flavoring with a little more sugar, and left to sit for two to several days. As the fermentation process continues, the gasses that are released during the first fermentation cannot escape the air-tight bottles, which is what creates the carbonation in the final product. In essence, the second fermentation is only needed to add flavor and fizz to your “booch.” In fact, the liquid in the F1 container is quite delicious all by itself. It just lacks any fruity flavoring or carbonation.
SCOBY vs Pellicle
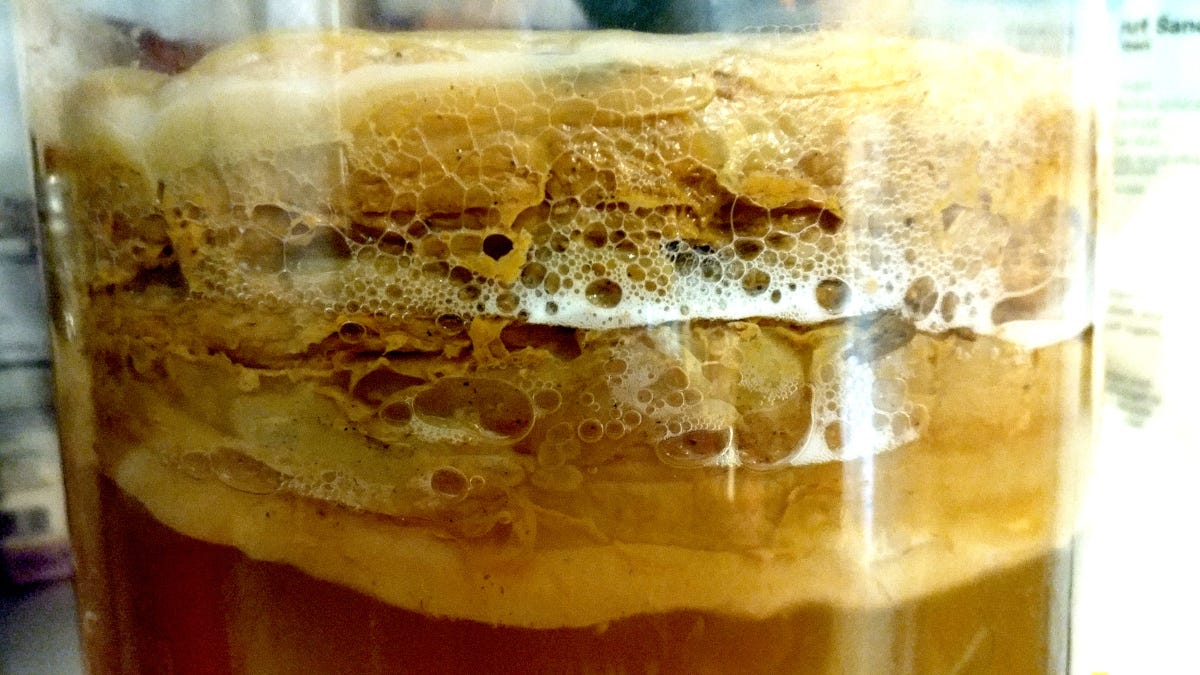
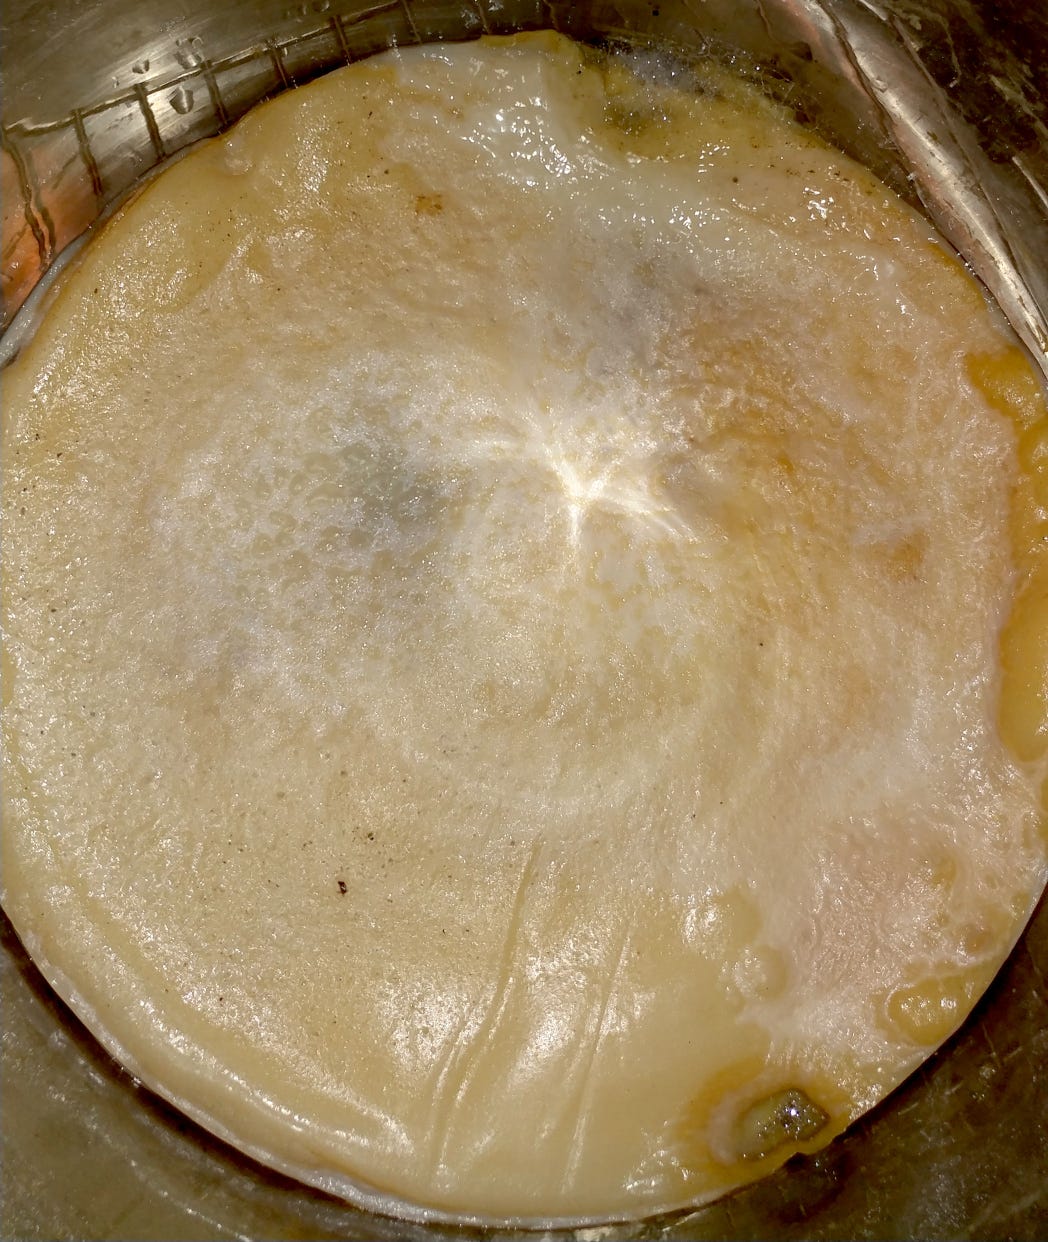
The secret to brewing kombucha is the symbiotic culture of bacteria and yeast (SCOBY). It is a brownish liquid. The SCOBY is NOT the grey-ish, leathery thing that floats at the top (generally) of the SCOBY. That grey-ish, mushroom-looking thing is called the pellicle. It is a byproduct of the SCOBY, not the SCOBY itself. When you acquire your SCOBY, it may or may not already have a pellicle formed. It is also worth pointing out that if the store-bought kombucha you drink does not have a pellicle formed or forming on the surface, then the product has been pasteurized and no longer contains live bacteria or yeast, meaning the primary benefits of drinking kombucha do not apply to it.
A pellicle will begin to form in all of your bottled kombucha. It will be a soft bit of goo that will float on the surface of the liquid in the bottle. The taste of the pellicle is no different than the kombucha itself and contains valuable nutrition. Some people dislike the texture of the pellicle and avoid drinking them by simply straining their beverages when they pour them.
Many people incorrectly refer to the pellicle as the SCOBY. Don’t be fooled. The SCOBY is the liquid that contains the bacteria and yeast. The pellicle is an inactive byproduct of the SCOBY.
Our Continuous Brew Approach
As we drink our kombucha, we take a “empty a bottle, then fill a bottle” approach. To accomplish this, we keep jars of our favorite fruit flavorings in the refrigerator. As soon as we finish a bottle of “booch” we add a small amount of flavoring to the bottle and then fill it the rest of the way with liquid from our SCOBY. Then, we label the new bottle and put it in line for fermentation. Once the SCOBY is about 1/2 empty, we brew more tea and fill it back up. We consume about one to four 32 oz bottles of kombucha per day, so end up brewing tea every 2 to 3 days.
Using this approach, the first fermentation is a continuous, ongoing process. The amount of fermentation that takes place is a function of how much liquid is taken from it and replaced with fresh tea. The faster you use the SCOBY, the less fermented it will be and the sweeter the flavor will be and the more carbonation it will have. The less you use it, the more sour it will be and the less carbonation you will get.
Kombucha Bombs
We learned the hard way that once bottled for the second fermentation, too much sugar can result in bottles that explode with pretty dramatic force, because the amount of gas and pressure resulting from it can be pretty intense.
The most common ways that too much sugar can get into the bottles for the second fermentation are 1) adding too much sugar to the flavoring that is added or 2) not allowing the first fermentation to process long enough, resulting in more sugar being present.
Some Kombucha bombs are more dangerous than others. Sometimes, the pressure and carbonation get to be so high that when you open a bottle, there is a short delay and then kombucha foam sprays all around the space you are in. The more dangerous kind are those where the internal pressure becomes so great that the bottles shatter and spray glass and kombucha everywhere.
We were fortunate that the bottles of ours that exploded were inside the pantry, with the doors to the pantry closed, so no one was injured from the explosions. There was just a lot of wet mess mixed with shards of sharp glass that needed to be cleaned up.
The best way to avoid kombucha bombs is to make sure you do not add too much sugar to your second fermentation and that you let the first fermentation go long enough that there is lot a lot of sugar remaining when you use it for bottling.
Step 1: Acquiring & Growing Your SCOBY
In order to begin brewing kombucha, you will need to get and grow your own SCOBY, which is usually just a small amount of liquid containing the essential bacteria and yeast needed to ferment your tea. We purchased ours at Egg Plant Farm Supply.
Once you have your starter SCOBY, you need to grow it to a larger quantity, which we recommend doing slowly, because the ph of the liquid is what prevents mold from forming in it. To grow your SCOBY, you simply need to add brewed tea and sugar to the starter SCOBY you purchased and then each day continue adding a bit more until your first fermentation container is full and ready to use.
Tea Recipe
1 gallon of dechlorinated water (to dechlorinate water, let it boil for 20 minutes)
4 - 5 tablespoons of black, green or white tea, or any combination of the three
1 cup of sugar
Add the tea to the hot water, just below boiling temperature and let it steep for 5 minutes. Strain out the tea and add the sugar. Let the tea cool to room temperature before adding it to your SCOBY as high temperatures will kill the bacteria and yeast.
Flavoring Recipe
4 - 5 cups of fresh fruit
2 cups of water
1/2 cup of sugar
2 tablespoons of ground ginger (optional but recommended)
Simmer on the stove for 20 minutes, let cool and store in the refrigerator to use as flavoring for your bottled kombucha.


